

In our house, the Christmas tree is down, all our ornaments are stored away, and we’ve eaten all our holiday cookies and fudge.
And that mean’s only one thing: Valentine’s Day is on the way!
If you’ve read my quilling paper hearts tutorial from last year, you know how much I love Valentine’s Day.
I had to up my Valentine’s hearts game a little this year, so I thought I would share a how-to for 3-D quilling paper hearts!

These 3-dimensional hearts are a wonderful stepping-off point for any beginner quillers who are looking to expand into the 3-D world, and the supplies are pretty basic.
All you need are your favorite quilling tool, some glue, the quilling paper colors of your choosing, and a way to mold your quilling shapes. Don’t fear, there’s more details on that below!

For the smaller hearts, I rolled two tight coils from quilling paper strips that measured 20″ each.
If you’d like to make larger hearts, you simply have to add more strips to the coils as you’re rolling them. Check out my post on quilling paper acorns to see some photos on how to make bigger 3-D quillings.

When your the glue on your coils has dried, it’s time to mold your coils into a 3-dimensional dome.
This project was the first time I’ve been able to use an actual quilling mold for make my domes. It definitely makes for a speedier and more consistent bubble in my coils. If you’re not looking to pick up a mold, you can easily DIY your 3-D quilling, just like I did when I made my daffodils and holly berries.
To use the mold, simply place your coil on top of the dome that’s about the same size. Then, spread your fingers towards both sides of the coil so it’s evenly pushed into shape.
 Don’t forget to add a little glue to the underside of your dome!
This will prevent your 3-D quilling from collapsing back on itself.

You’re ready to form your hearts!
When the glue is set, make a teardrop by pinching one side of your dome. But don’t press too hard, too fast!
I made that mistake a couple times and the middle popped right out of my teardrop! You might be able to remold your shape if it happens, but more often than not, you’ll have to scrap your teardrop and start again.

This next step is a little tricky.
In order to make these hearts have the exact right shape, add a small line of glue to one side of a teardrop and squeeze them together.
TIP: Squeeze your heart more than you think you’ll have to! I tried a gentle hand on this and I found the result wasn’t the perfect heart that I was looking for.
Use pins to hold your heart together until it dries, if needed. So many colors and sizes!
Maybe get really creative and make your coils from a few different shades so your hearts have stripes!
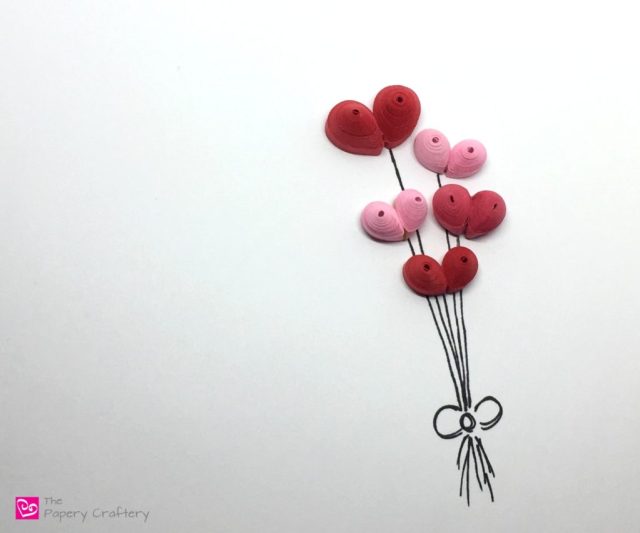
 Use your 3-D quilling paper hearts to embellish your Valentine’s!
I used mine to make this quick card with some heart-shaped balloons.
How are you going to use your 3-D hearts? Leave a comment below this post and let us all be inspired by your idea!


Share your thoughts and leave a comment below!