Now that we’re almost fully into the Yuletide season, the next few posts from me are going to be chock full of holiday goodness!
This week, I’m sharing a craft that can seamlessly go from Christmas, all the way through the winter – Scandanavian gnomes!
I know you’ve seen them – little men with long, fluffy beards that are the only thing visible under pointy hats.
I took that idea and crossed them with a wooden peg doll to create a quilled winter gnome that anyone can create!
These sweet little gnomes are made from very basic shapes and a bit of fancy quilling needle tool work.
The first step is to make the body.
Roll a tight coil from about 60″ inches of the quilling paper of your choice.
Shape into a tall dome with your fingers or another tool.
Here’s a quick tip – when you’re making a really high dome, it’s easy to get over excited and ruin it by pushing too much or trying to shape it all at once. To avoid the entire thing falling apart, I like to make my large domes in stages. I like to shape a small section, apply glue with a brush to the inside and let dry. Once that’s set, I move on to shape a little more, and so on.
I’ve found that this technique might take a few more minutes, but it beats having to remake the entire dome when it unravels!
After you’re happy with the body, it’s time to make the head.
Really, we’re just making a face.
Because we’re going to add loads of hair later, you won’t see the back of the head, so there’s no need to worry about it!
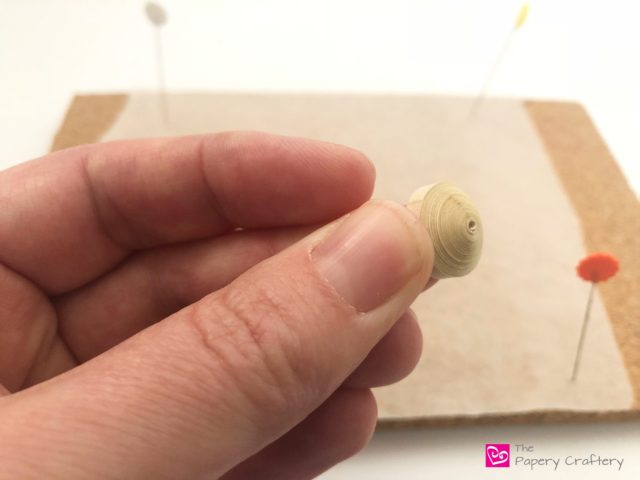
Roll another tight coil. This one will be formed from about 48″ of paper.
In this example, I’m using Lake City Crafts’ Natural Parchment.
Push out from the center to make a small dome, brush glue to set, and dry.
Attach your face to the top of the body.
Now it’s time for your gnome’s hat!
We’re going for a bent cone shape.
This is similar to the steps I used to make the stems in the 3D mushrooms I just demoed.
Start rolling a long strip of quilling paper with a long slotted quilling tool. (My new favorite tool – I can’t recommend this enough!)
As you turn your tool, allow the strip to overlap a little.
After you glue the end, push the side of your hat against your tool, and you’ll see a slight bend.
Brush the outside with glue and let dry before pulling the hat off your tool.
I almost forgot about the nose!
Using the same shade as your face, cut about 5″ of quilling paper in half to make a skinny strip.
Roll that into a tight coil and glue to the center of your quilling paper gnome’s face.
Of course, if you have 1/16″ paper, that will work perfectly!
By now, your hat should be dry.
Carefully pull it off your quilling tool, and try it on your gnome.
I made a few hats that were a little small so I just added a bit more paper on the bottom with my hands. Easy peasy!
The most fun part of making your quilling paper winter gnome is, of course, the hair and beard.
Again, you’ll want to cut white 1/8″ strips in half or use 1/16″ paper.
Your gnome can have any kind of hair you like. Try super straight or loads of curls!
I like to mix it up. I used some straight pieces, some with curls, and a bunch of spirals, too.
Now you’re ready to add the hair to your gnome.
Brush some glue (I’d go with Tacky Glue) onto the inside of your hat.
Add your skinny strips with tweezers so the back and sides are completely covered.
Because the hair is attached to the hat, it will lay over the back of the gnome. This is why we didn’t need to worry about making an entire head.
When you’re happy with your gnome’s hair, glue the hat onto its head.
You can always add more hair with your tweezers if you see a spot that needs some fill in.
Add more strips for a fluffy beard.
I also made a long mustache made from swirls and glued it under my little gnome’s nose.
Another option is to go for a more goofy hat with a spring on top.
These are super easy to create!
First, layer two 22″ strips of quilling paper together. You’ll need a thick, sturdy strip for this hat.
Push out the center into a dome, and brush glue on the inside to set.
Here’s the most important step – when adding the glue, do not add any to the very middle of the dome.
Try to keep the center 4 or 5 rings clear of glue.
When the glue is dry, push the center out with a thin tool.
The middle should pop out, while the rest stays put.
Pull gently with your tweezers to get the spring effect!
Once you’ve gotten the basics done, you can create quilling paper gnomes of all sizes!
I even made some with striped shirts.
If I had a fireplace with a mantle, I’d have these guys lined up all winter long!
I know that there was a lot of information in this post, but the steps are really simple once you get started.
I’m sure these little gnomes will soon be a sweet addition to your holiday decor.
How will you use your quilled winter gnomes?


How cute! Love your design and these can be done by anyone, even me!
I’m glad you like them, Barbara!
great tips and very cute. Hat making tips work for arms for quilled people.
Yes, I’ve seen many arms like that. They make cute, little bell sleeves!